DIY ideas with fabric scraps to make the old items look stylishly new
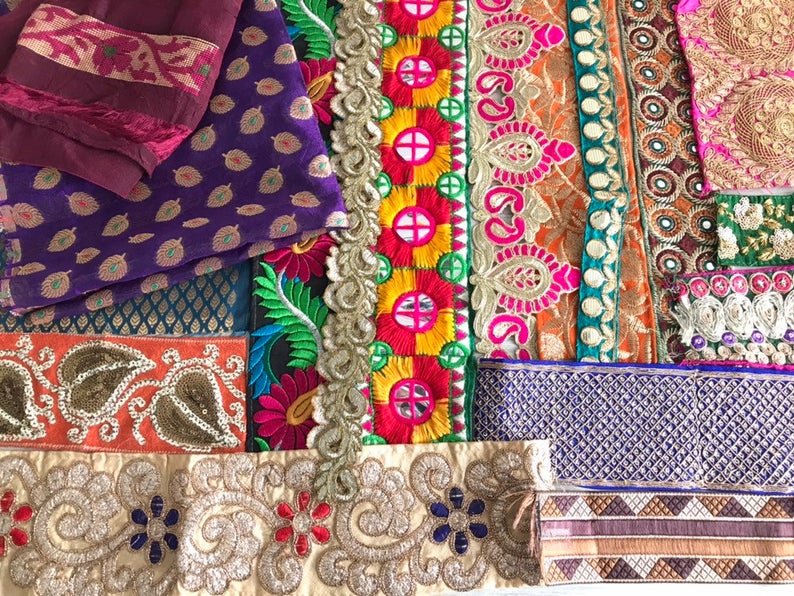
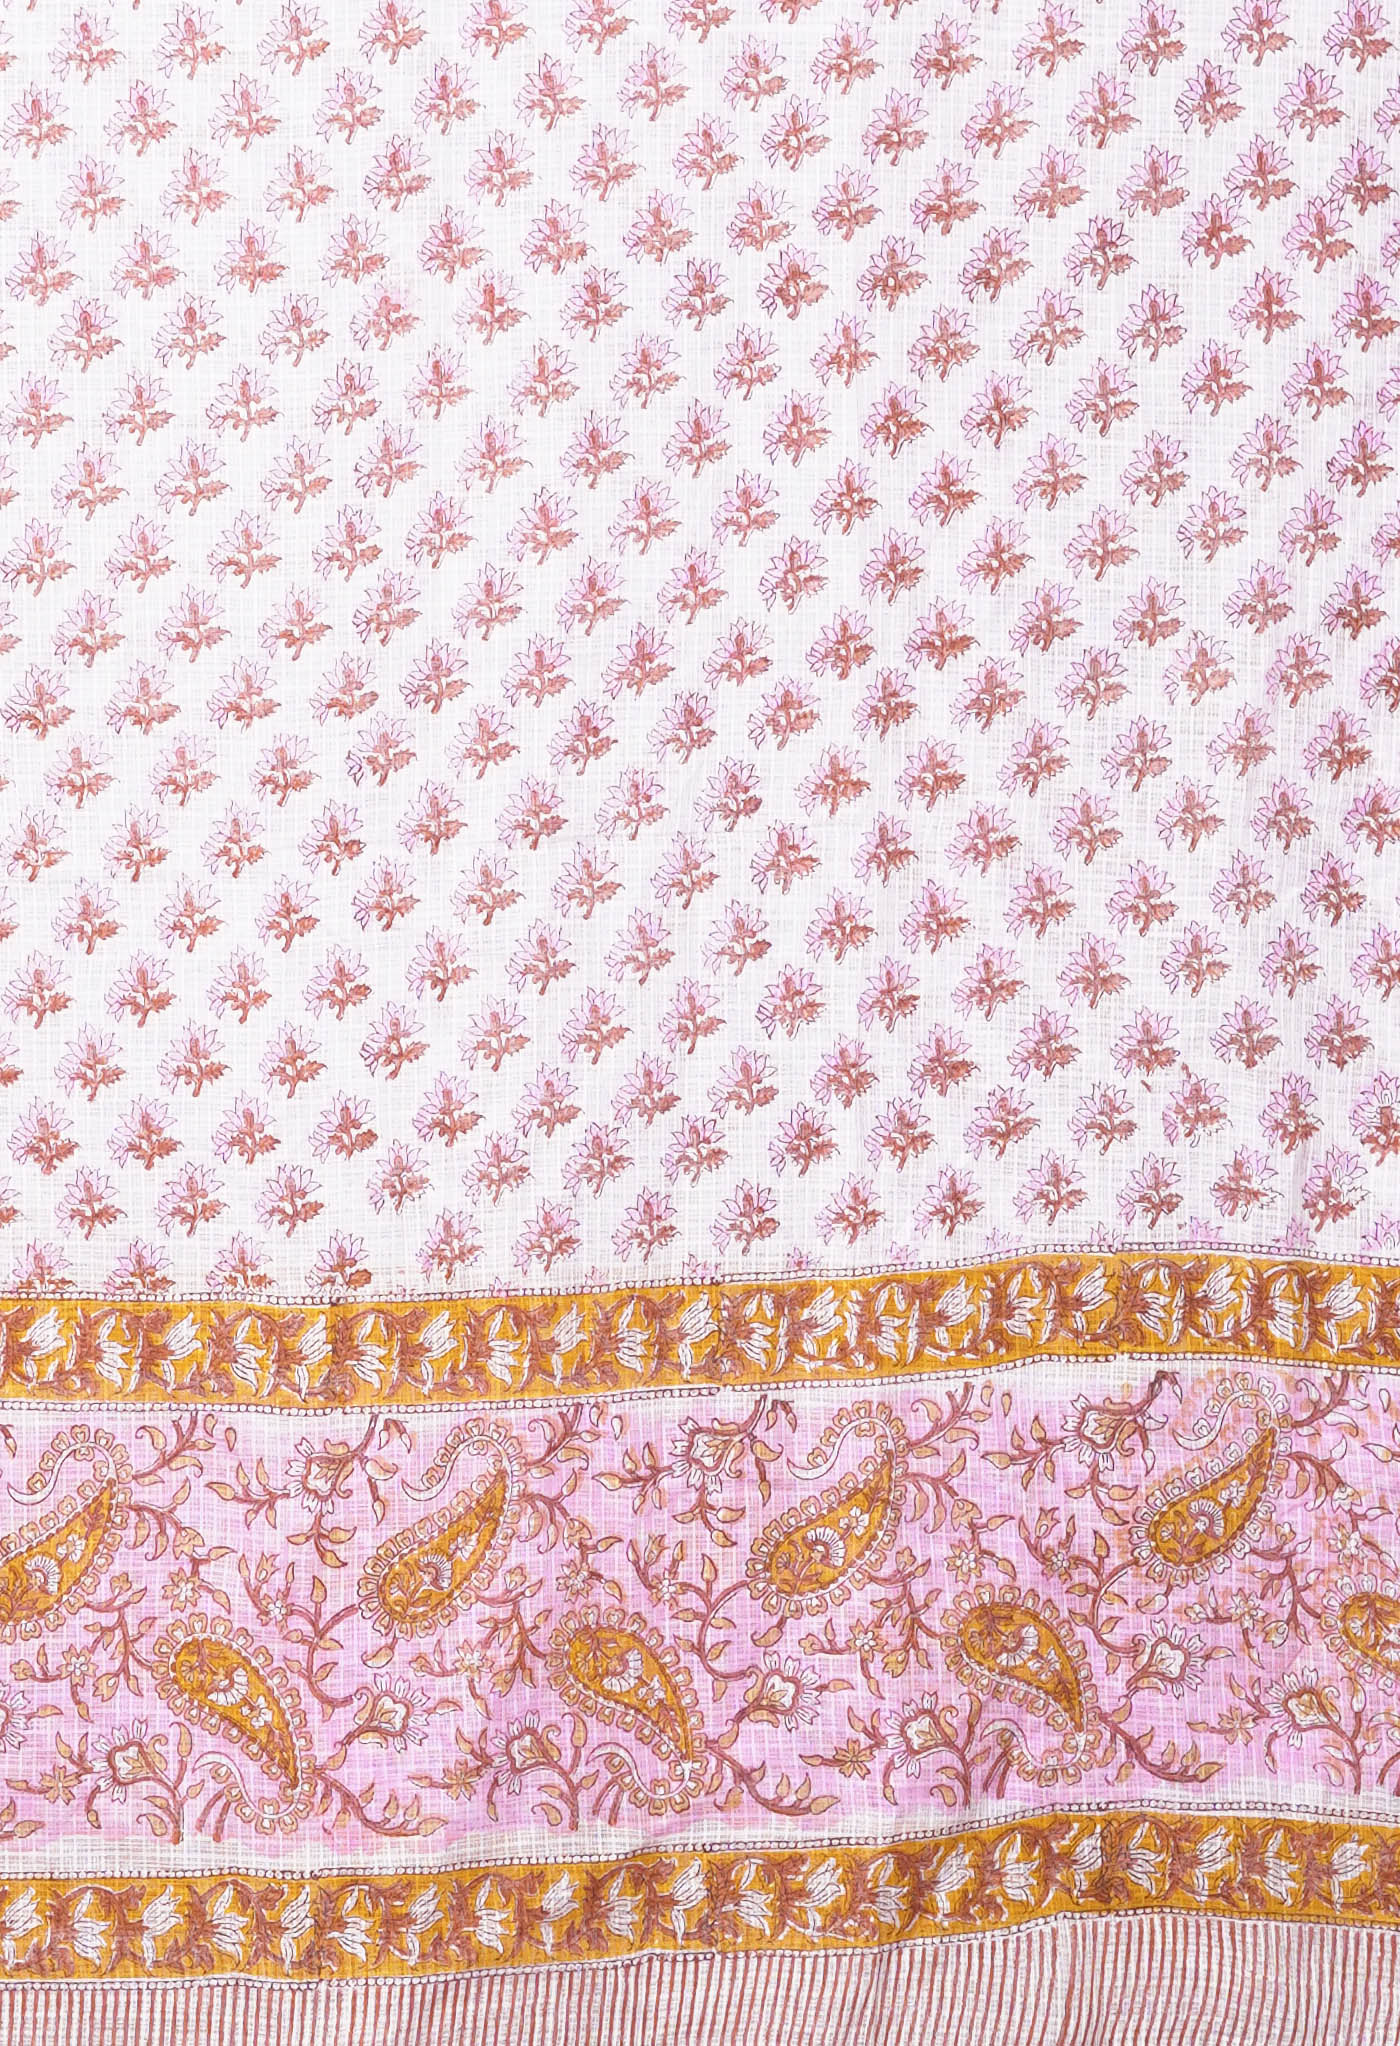
If you are a fabric lover and keep buying every now and then, you sure must have a pile of clothes by now that would serve your appetite for variety. And if you are the DIY sort, well, life has been and always shall be interesting for you. So get ready to try out some more ideas in sprucing up your environs with leftover fabric scraps.
There must be dozens and dozens from your collection that are for some time now, just been occupying space in the cupboard. Get them out now, see what ideas are available and brighten up your life stylistically.
Hexagon designer Bag
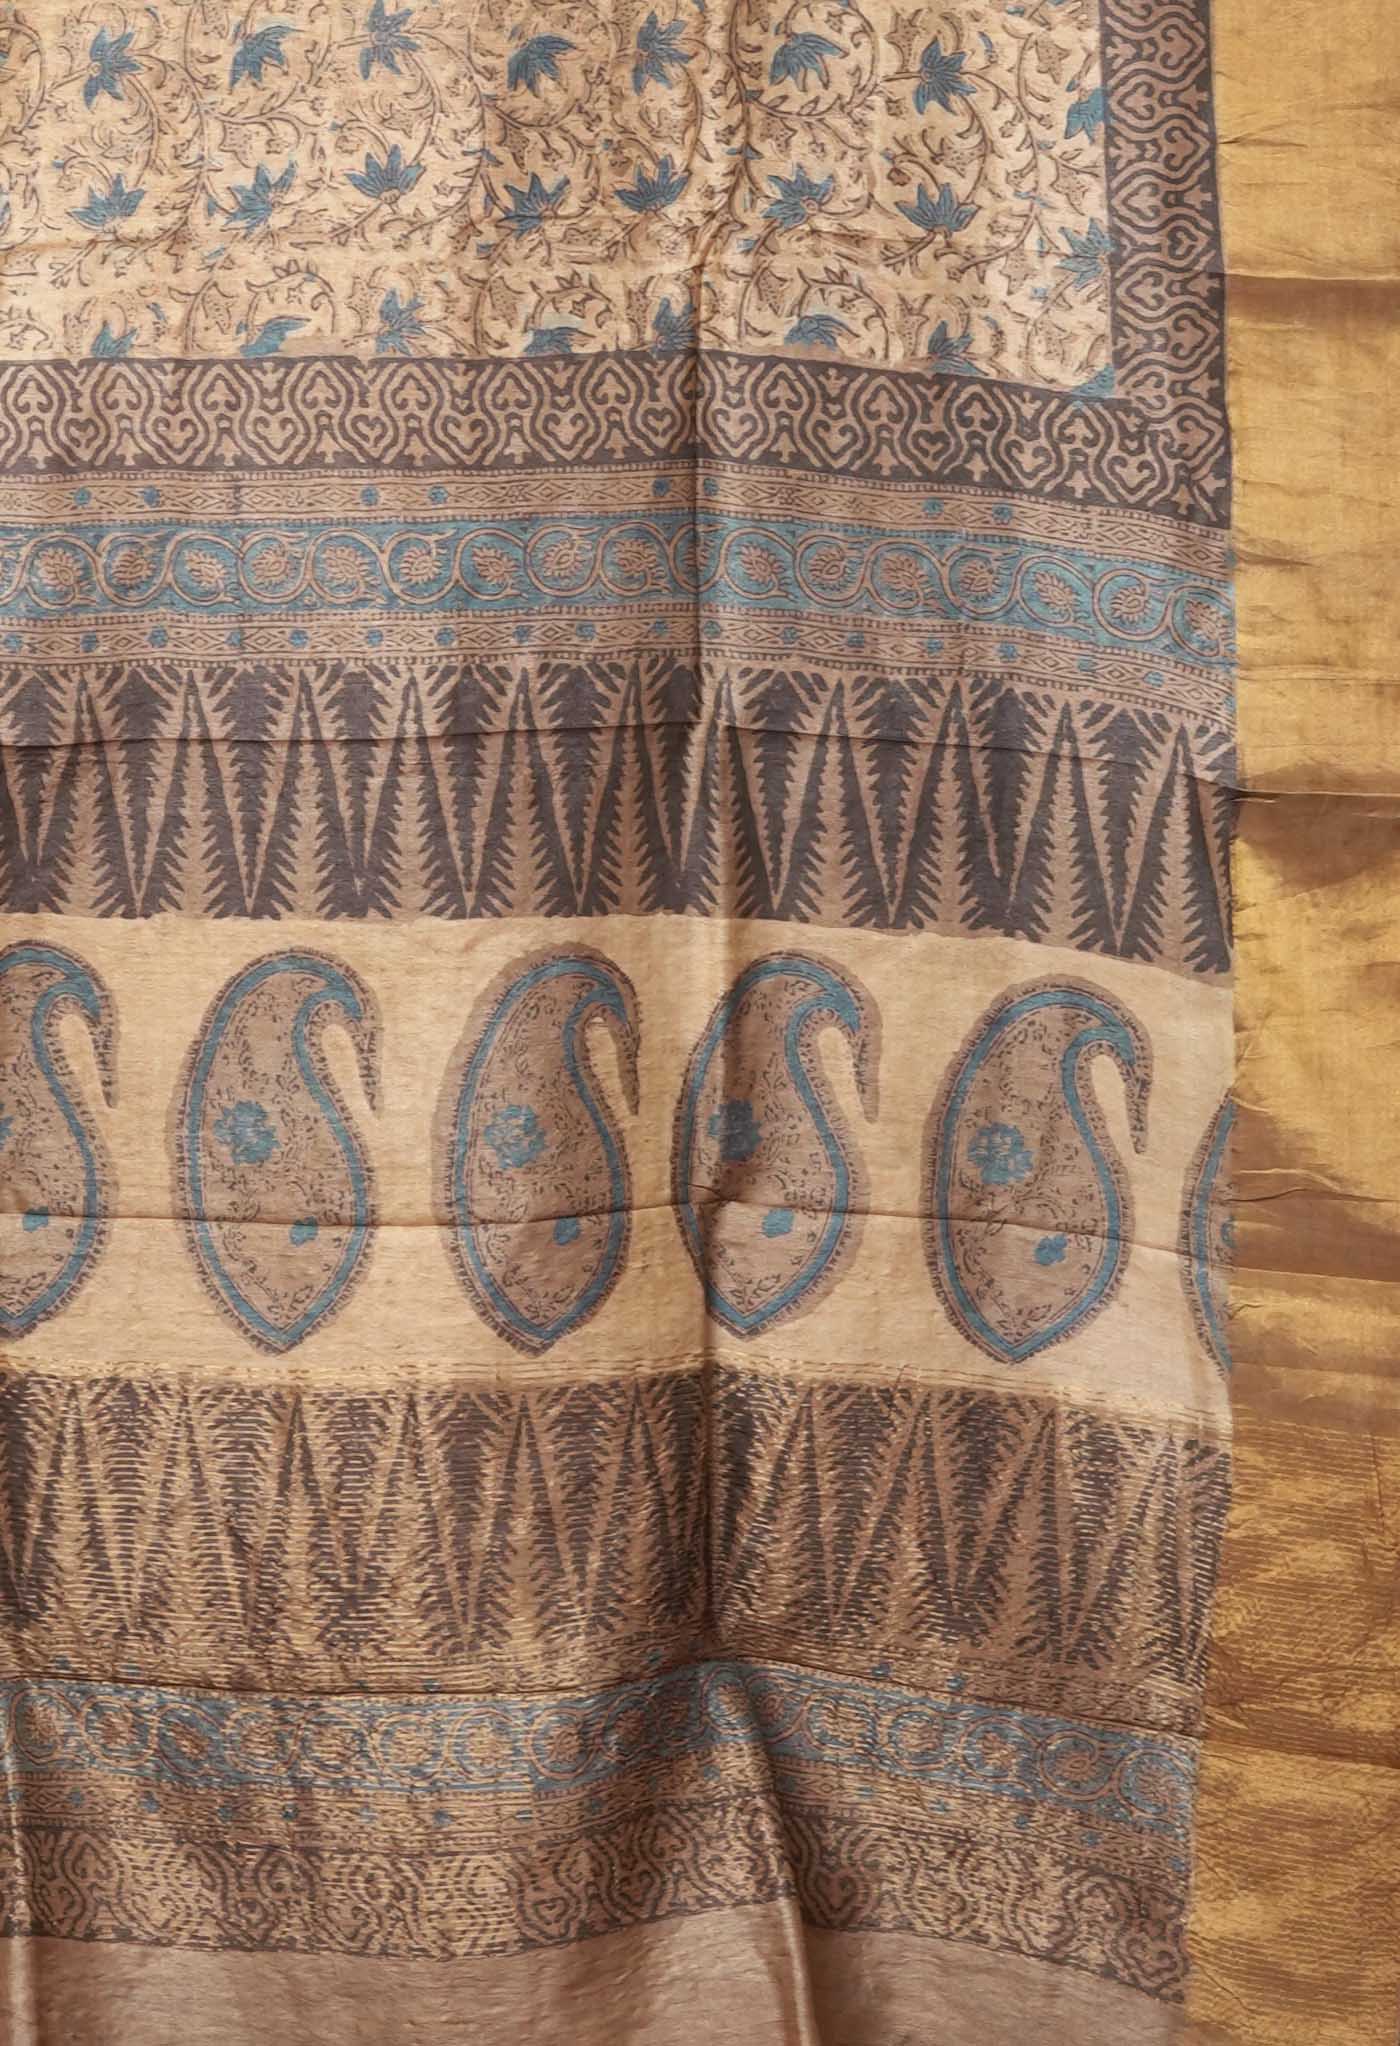
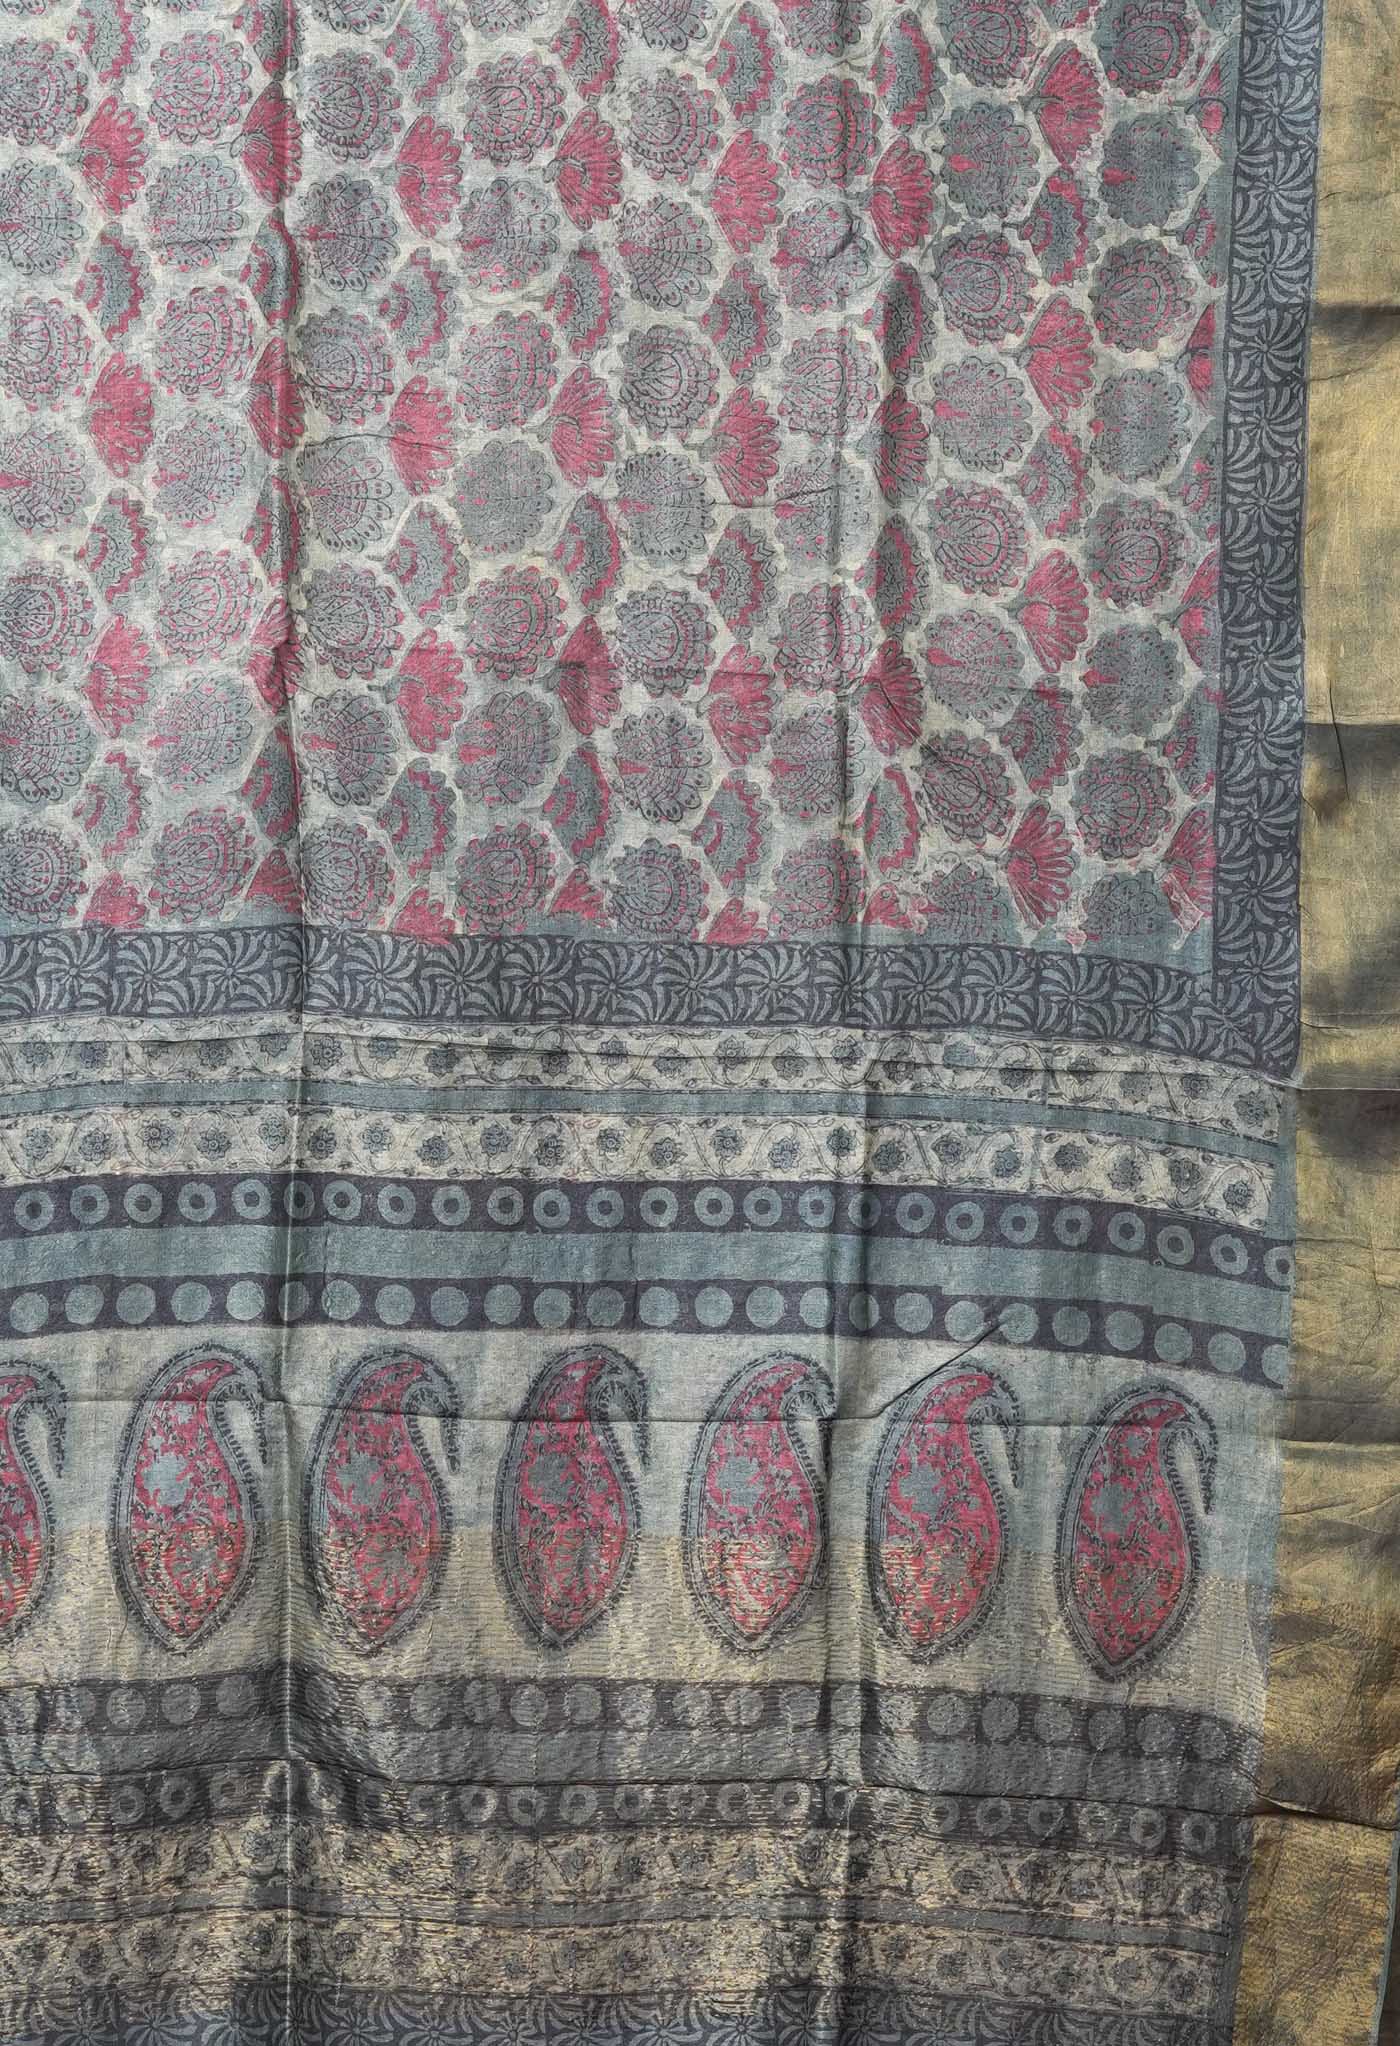
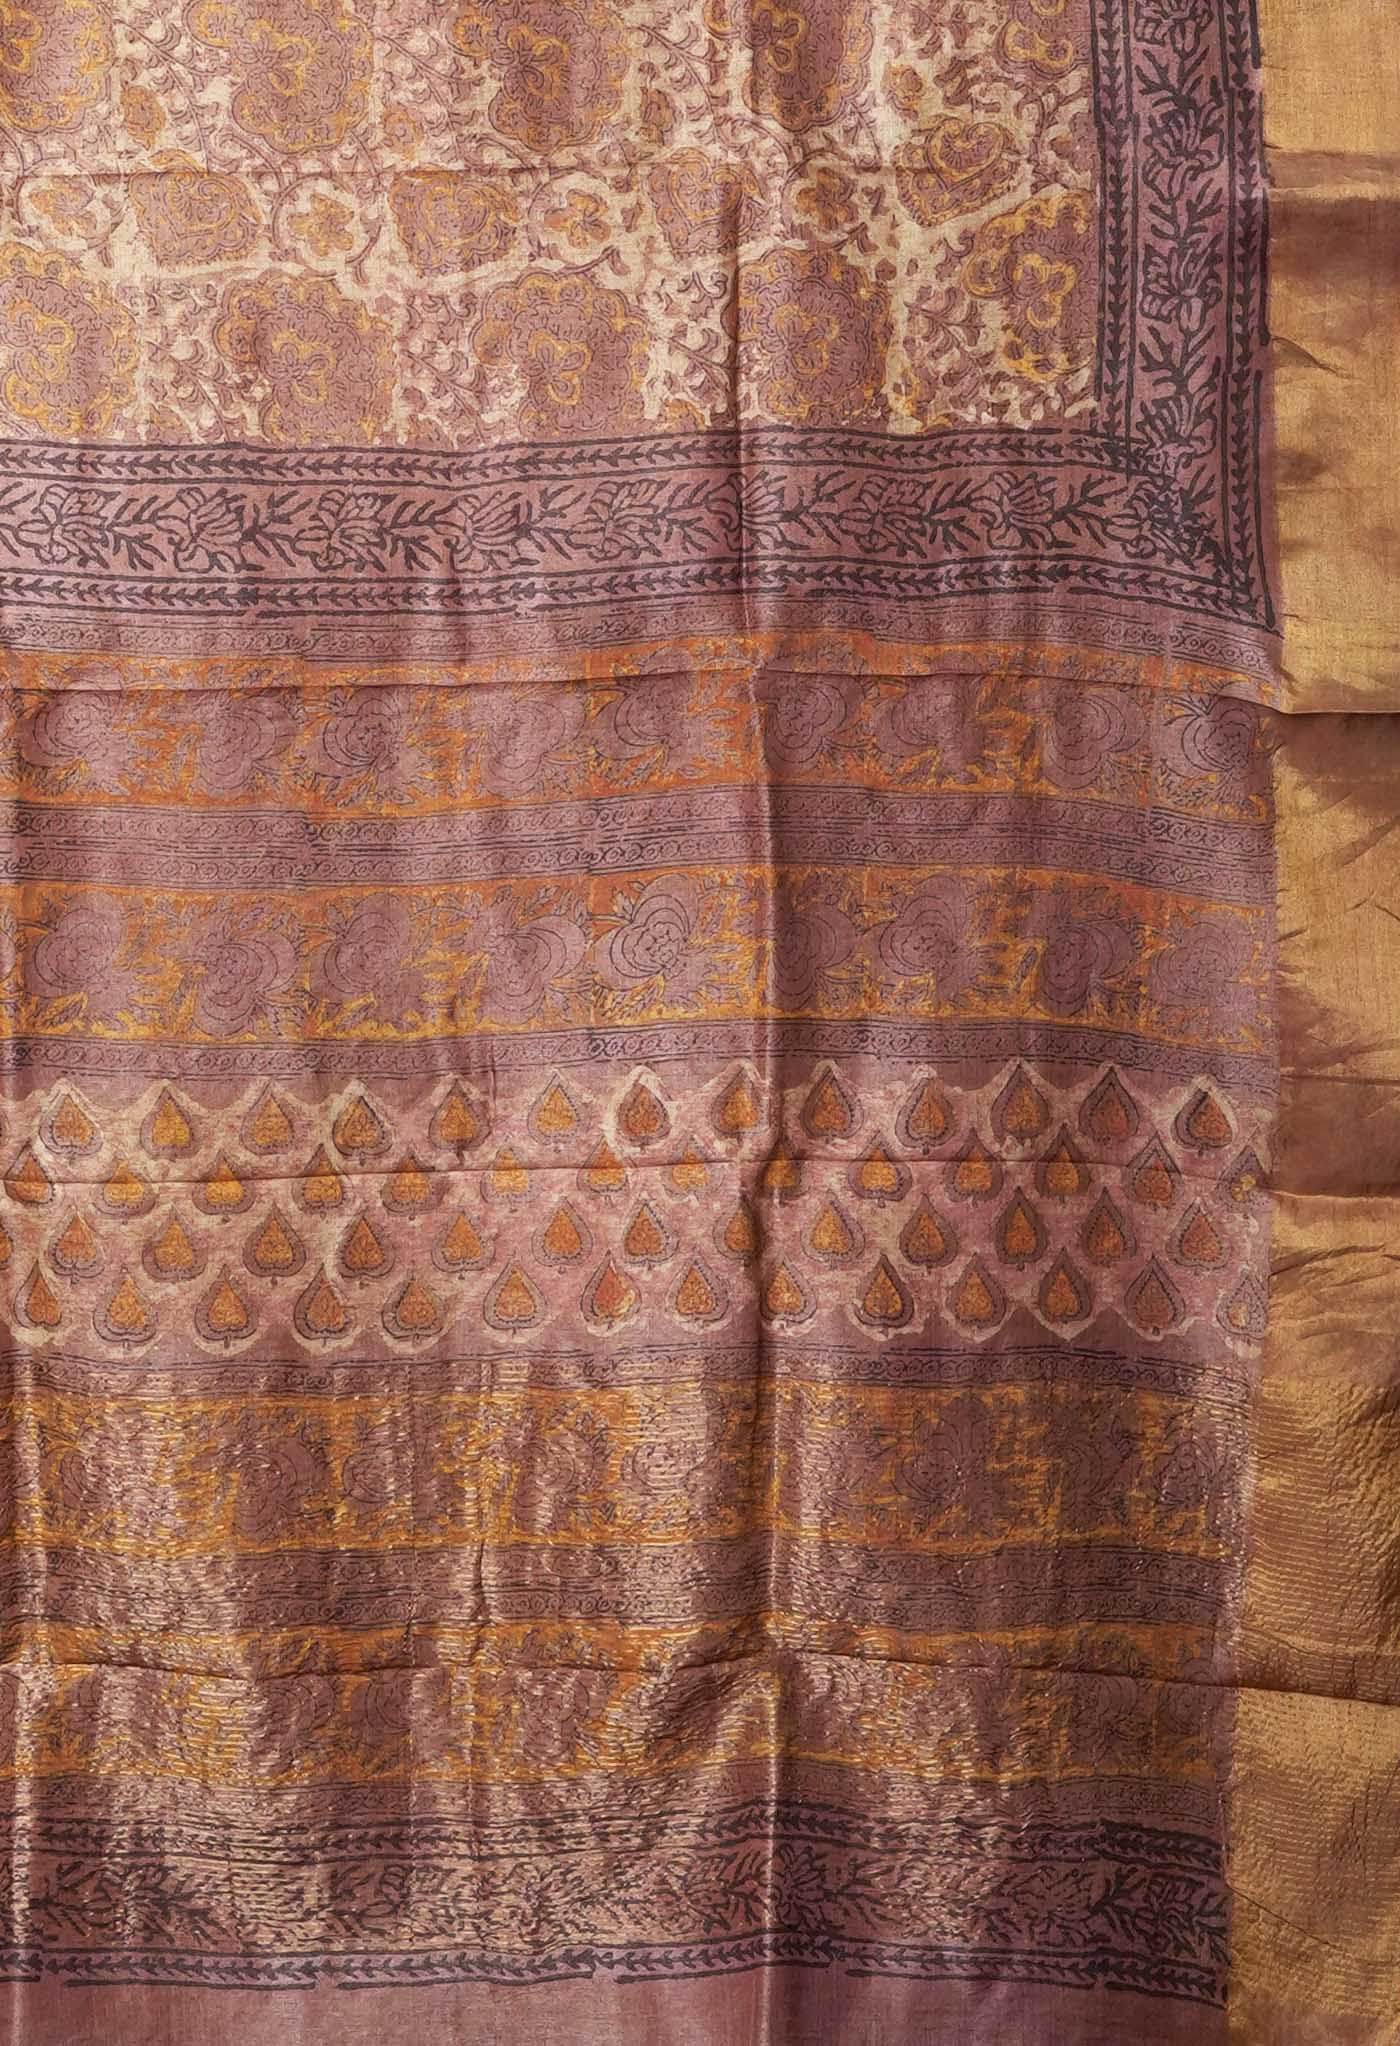
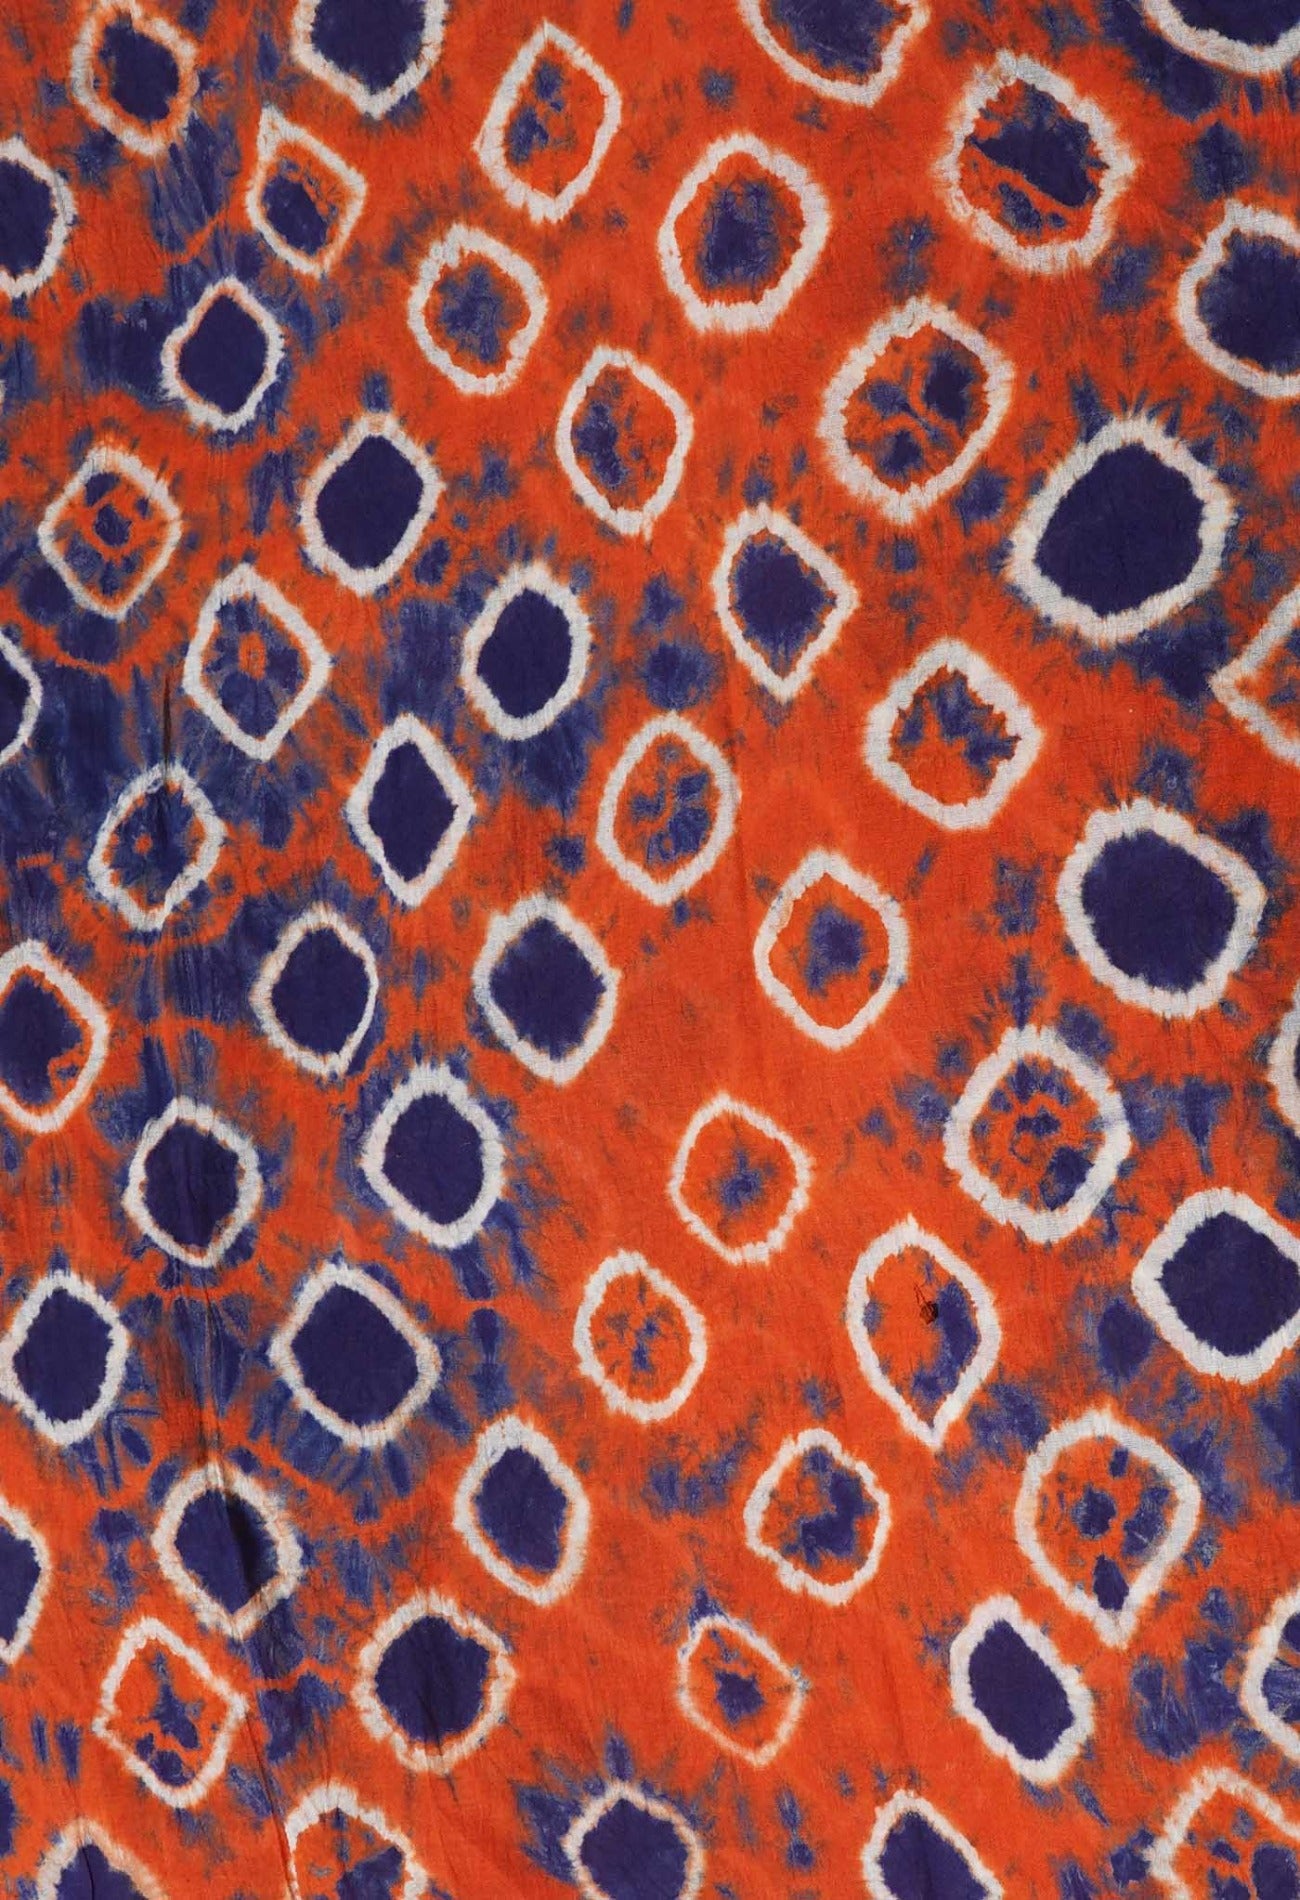
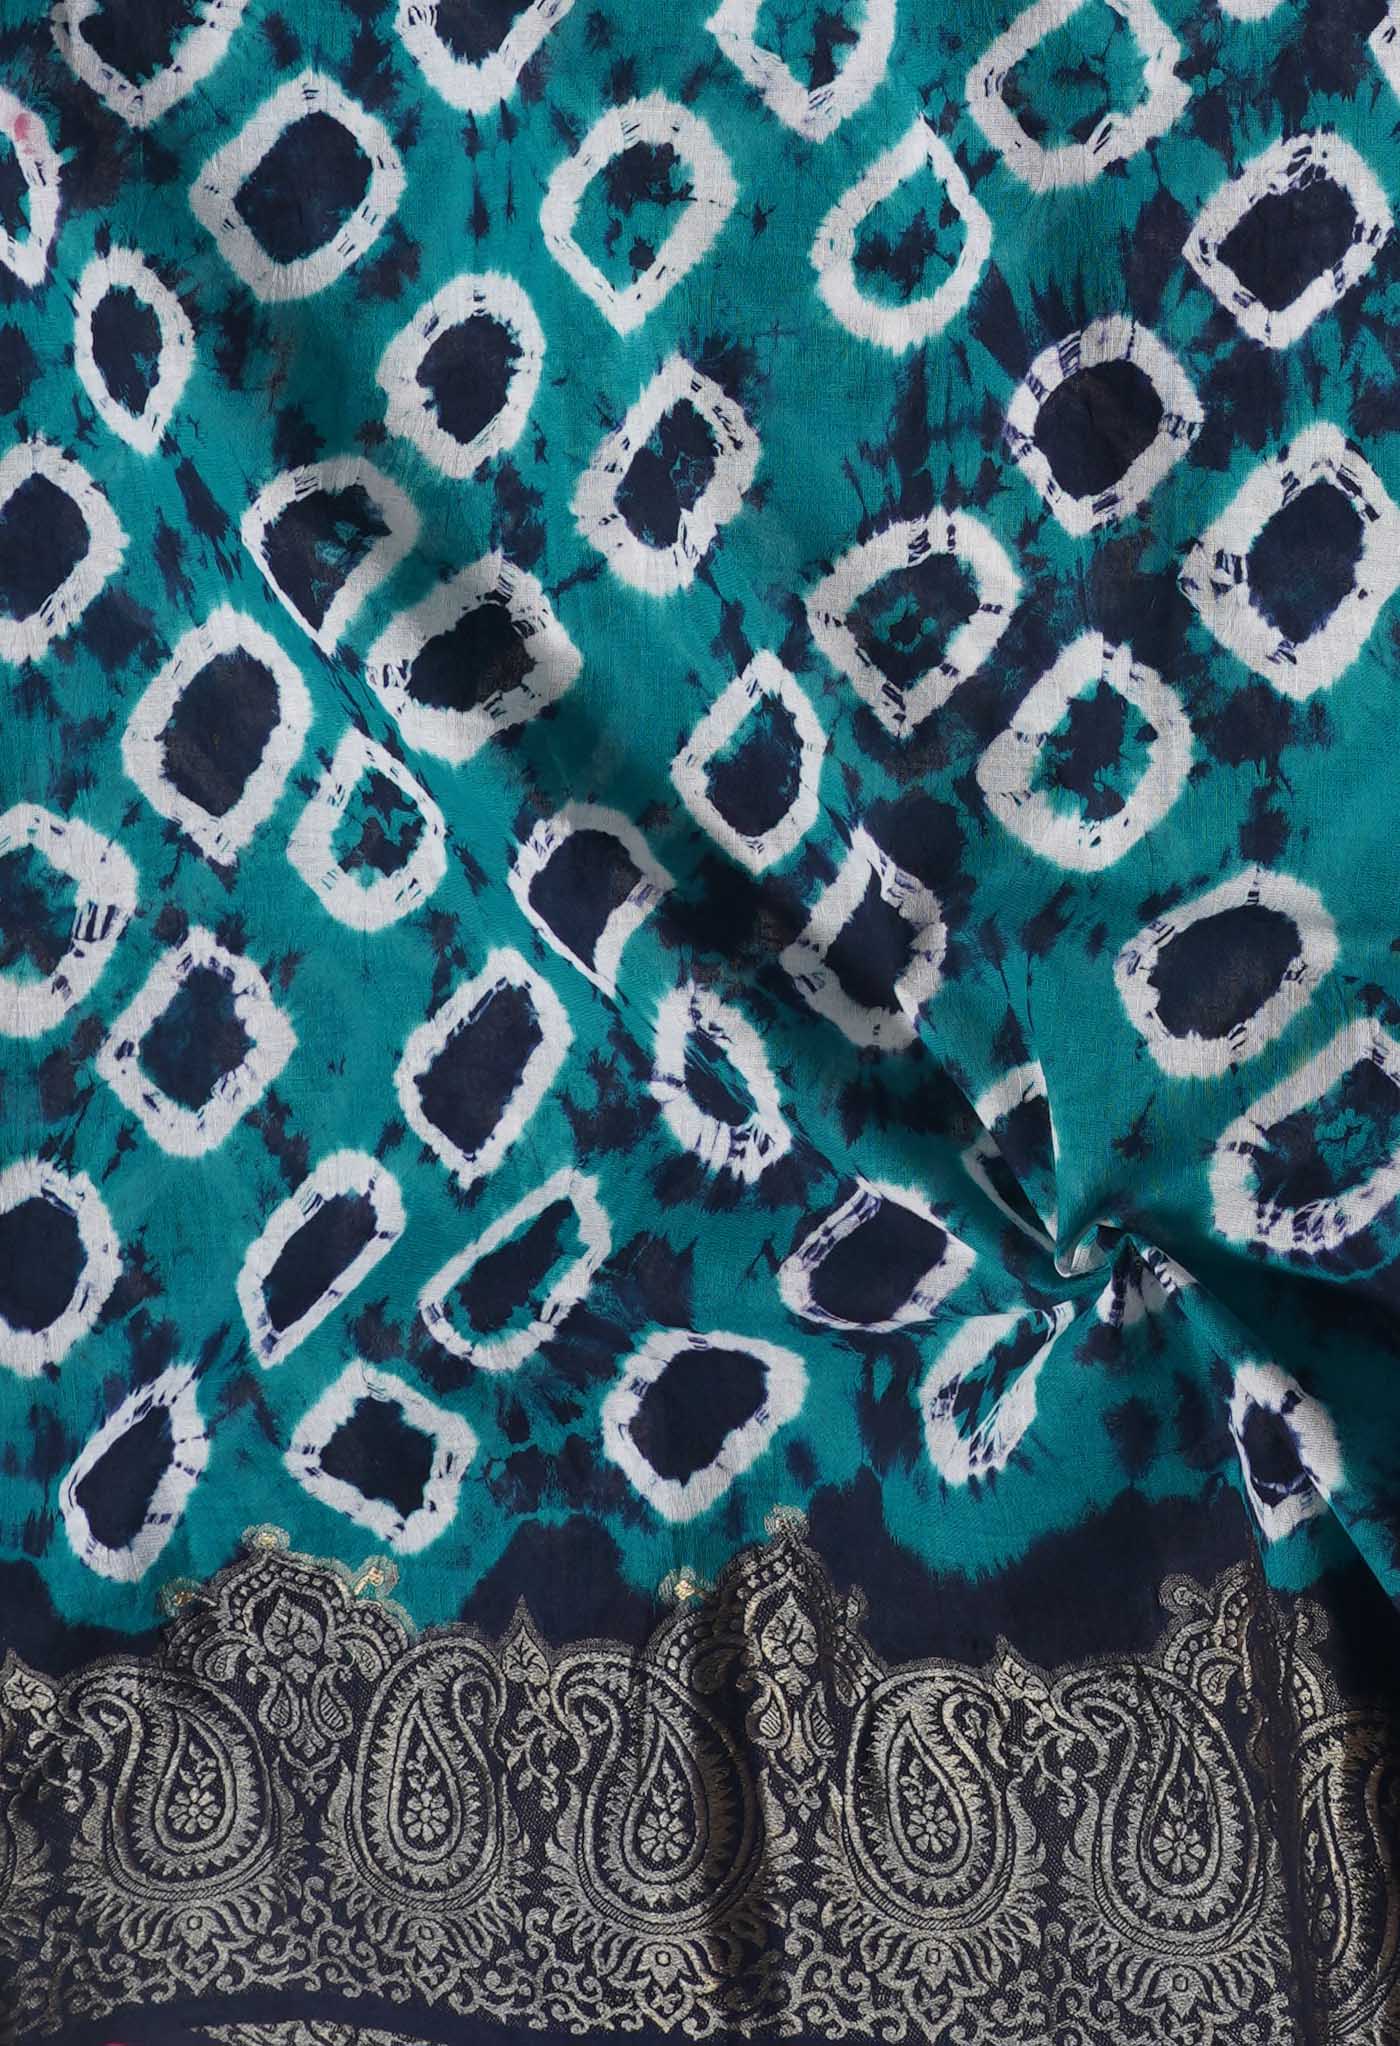
You got a nice Canvas bag. But it is simply dull canvas colored or plain white. It has utilitarian value but no “face value”. Now we’ve got to make it appear much more interesting. How will that be? We’ll take out about ten of old fabrics from your scrap collection of sarees, kameez or dupattas. That should be interesting enough.


DIY Cord Keeper from Fabric Scraps
Fabric Scrap Bookmarks


Crazy Coasters
Fabric Scraps To Restyled Shoes
What you'll need: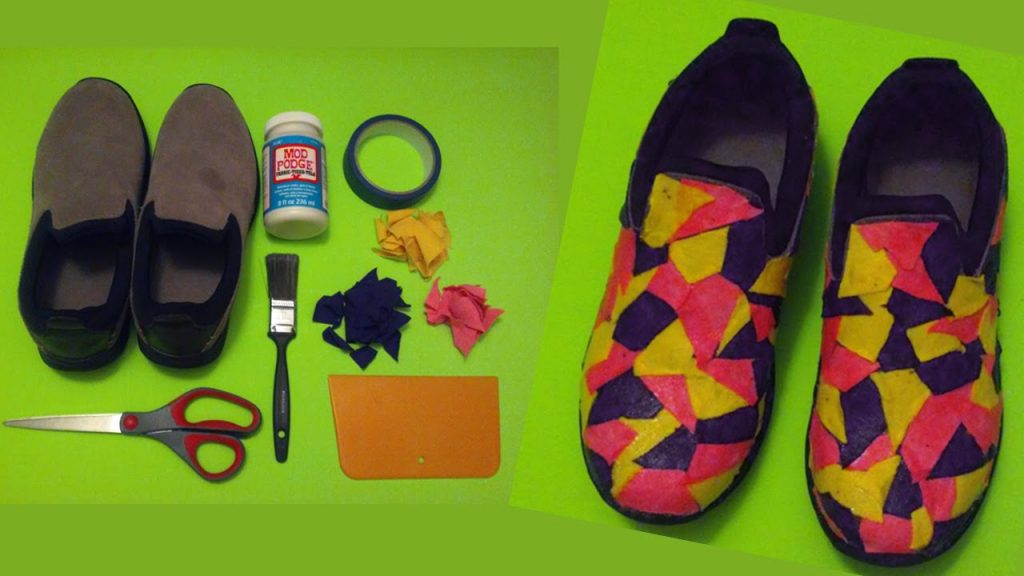
A word of caution - "Fabric glue will hold up best on decorative items that don’t have to be washed often."
The main aim is to eke out a season or two more, not think it is a new one that has been replaced.
DIY Yoyo Puff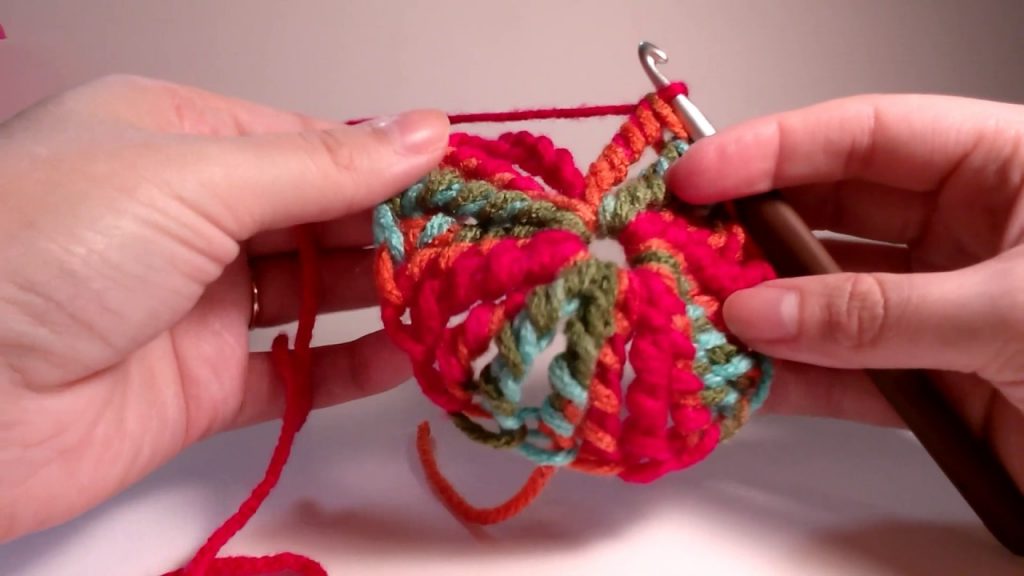
Fabric Scrap Twine
You will need:
The Method
Step 1: twist strip away from you
Step 2: pull that twisted strip over towards you
Repeat
Materials you would need:

Scraps of 2 coordinating fabrics
Scraps of fusible fleece
Method :
Things you will need:
- Coffee Sleeve Supplies
- Fabric scraps from up to 12 different fabrics
- 4.5″x12″ piece of backing fabric
- 4.5″x12″ piece of fusible fleece
- 1 coordinating elastic hair tie
- Small button
- Coordinating thread
- sewing machine
- scissors
- Seam Allowance: 1/4″ unless noted
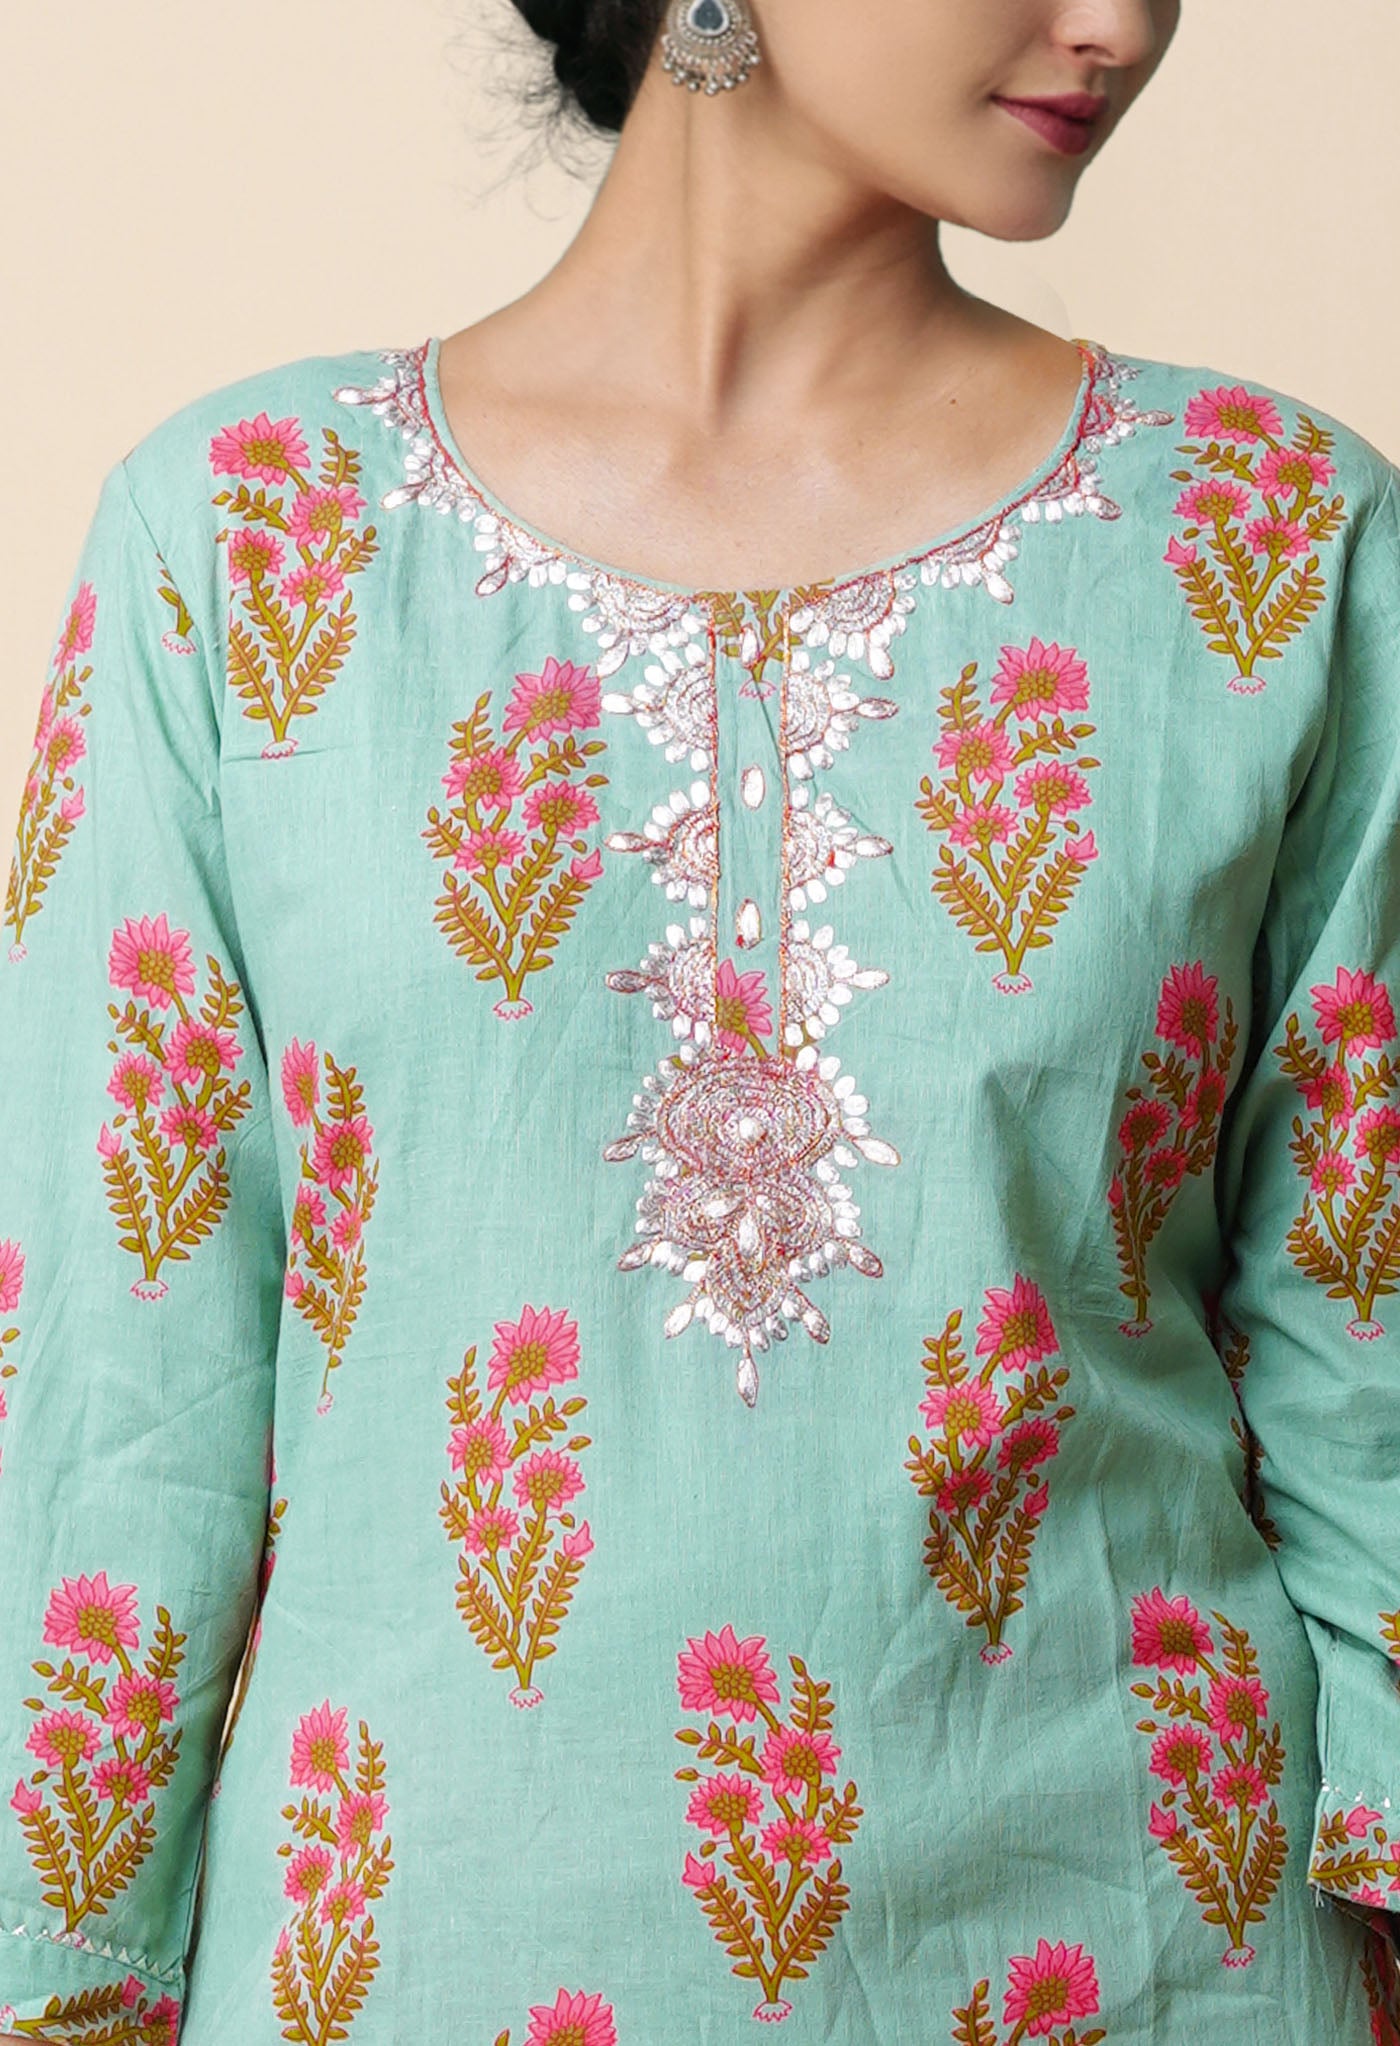
And how about the flower at the centre?
A Scrappy Strip Rose
You’ll need:
How to do it
You could use as little or as much material as you want, depending on the size basket you are making.
Materials list:
- A collection of old t-shirts or similar colorful material could do
- Jersey fabric, minimum 1 yd. length for braid continuity
- Spool of nylon crochet thread (a dark color is preferable)
- Beads with minimum 1/4" dia. holes (optional)
- Thread
- Sharp upholstery needles
- Regular needles

step 1, cutting:
- Cut the jersey fabric and the t-shirts into similarly sized strips, around 2-2 1/2" wide.
step 4, sewing the bottom: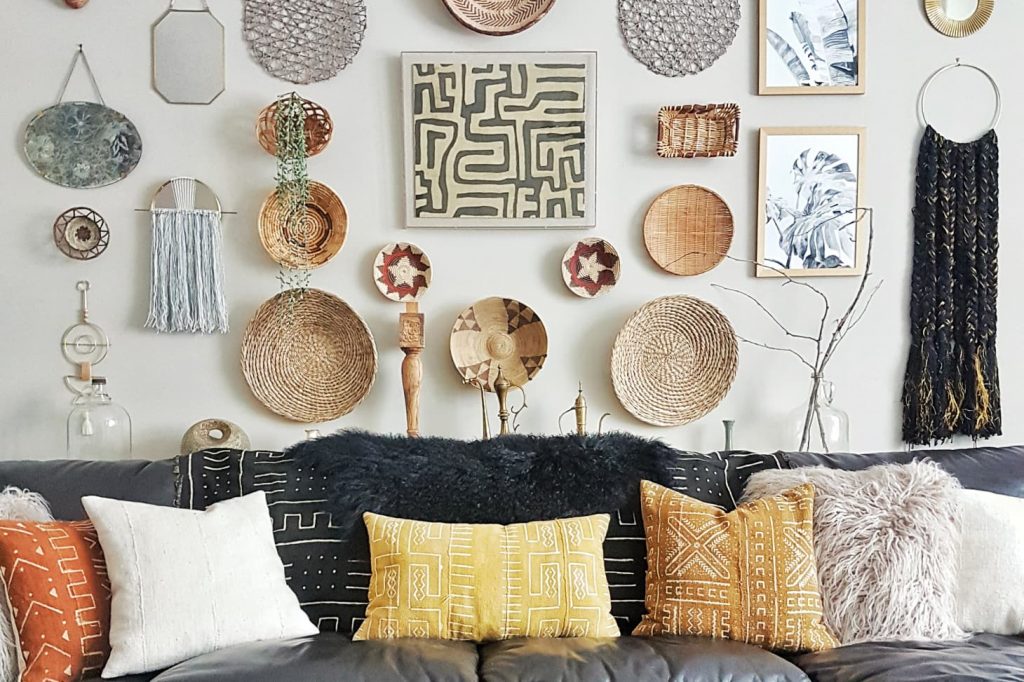
step 6, adding handles and finishing the job:
There must be dozens and dozens from your collection that are for some time now, just been occupying space in the cupboard. Get them out now, see what ideas are available and brighten up your life stylistically.
Hexagon designer Bag
You got a nice Canvas bag. But it is simply dull canvas colored or plain white. It has utilitarian value but no “face value”. Now we’ve got to make it appear much more interesting. How will that be? We’ll take out about ten of old fabrics from your scrap collection of sarees, kameez or dupattas. That should be interesting enough.
- See that the ten pieces of different interesting and varied designs are chosen to get a pot pourri mix.
- Get a hexagon template (in this example) not too large but big enough to get ten sizeable hexagons arranged neatly, in say, a honeycomb pattern or whatever other pattern you have in mind on the face of the bag.
- From the ten square pieces get ten differently designed hexagons by placing the template on each of the saree pieces, marking the hexagons on the saree pieces and then cutting the hexagon shapes.
- If you like the designer hexagons a bit thicker choose three hexagons of each design.
- Place the same design hexagons exactly one over another and get your desired thickness. Seal the hexagons of each set to keep them one below another by putting a single stitch at each of the six edges of the hexagon. Do this for all ten hexagons.
- You have ten hexagons ready now.
- Decide how you want the hexagons to be arranged.
- Iron the pieces neatly. Then simply embroider them in place according to the pattern with simple color thread. If you choose thread matching the end portions of the hexagons you would be creating a truly designer version on your bag.
- Do for both sides with five plus five or ten plus ten.
- Nice isn’t it?
- Hexagon was an example. Any shape would do if you are innovative. Be it pentagon, square, triangle or any other geometrical shape that you would like.
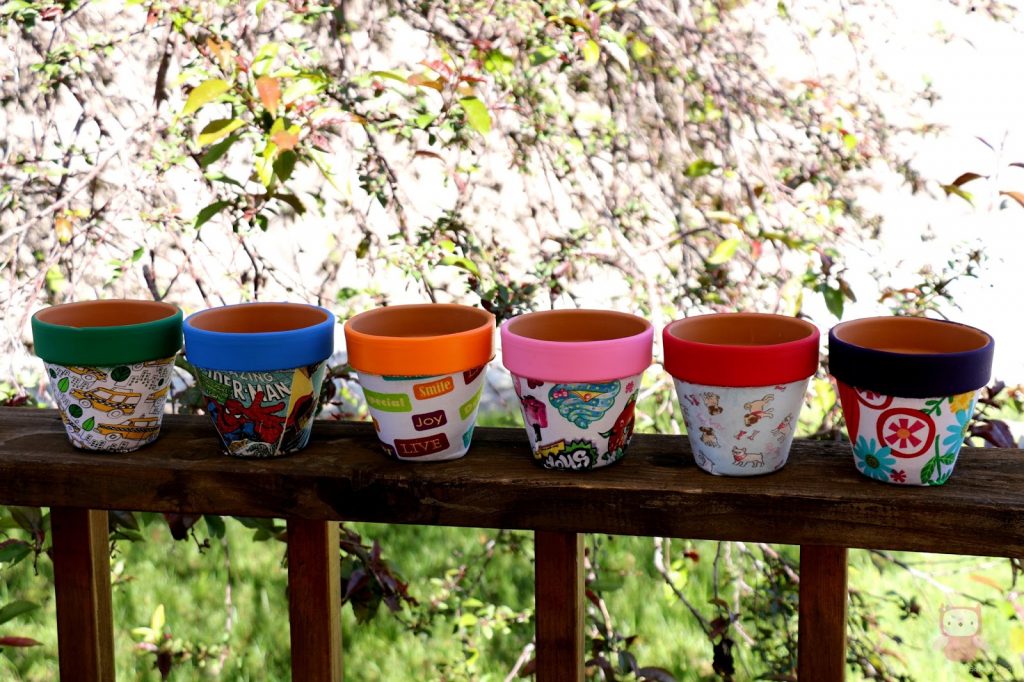
- Choose a fabric that you would like to decorate your flower pot with. First wrap the pot with the fabric to get an idea if the piece is large enough to cover it. Then cut in the most suitable size.
- Before starting the coating, glue the bottom of the flower top with tape and then paint it.
- Paint it with white acrylic paint in order to make the surface uniform and neutral. We do this to avoid any interference in the color of the fabric and in the end result. Remove the tape.
- Once the paint is dry, apply white glue in vertical lines and paste the fabric on it. Do it slowly and stretch the fabric to avoid crinkles.
- To finish, make a kind of wrapping and fix it with white glue.
- Cut with scissors the leftover fabric, and if necessary, apply a little more glue along the edges of the flower pot.
- Then pass the waterproofing spray over the surface to give the final finish and protection.
- Your beautiful pot is decorated and ready with its new look. Do likewise for other pots as well.
- Let there be a lot of variety and you would have a colorful array of pots in a colorful garden.
- Oh! By the way if there is a garden lover in your acquaintances gift him or her with one of the newly decorated pots and see a joyful expression on seeing the gift.
- Decide what scraps you’d like to use and iron on the medium interfacing to the wrong side of the fabric.
- If you’re going to do an applique or buttons, trace around your pattern onto the right side of the fabric so that you know how to place it.
- Iron on the wrong side of the fabric.
- Make sure you iron it to the side you want to be the “front” of your key chain.
- Then cut it out, along with the back of your key chain.
- Place wrong sides together, and place two pins about 1″ or so apart on the bottom.
- Sew from pin to pin, around the circle, about 1/4″ away from the edge.
- Then trim the edges all the way around with pinking shears.
- Cut a piece of your twill tape or ribbon about 2″ long.
- Fold it over your key ring, insert into the opening on the bottom of your key chain, and sew the opening closed, back stitching at the beginning and end.
- Trim threads, and you’re done!
- Decorate lots of your key chains. Pass around to friends and family and see them going Ooh and Aah.
- Easy Fabric Bows
- Your daughter’s hair is just getting long enough where her little bangs always hang in her eyes.
- Clips would work fine to hold them off to the side and out of her face.
- Make up a bunch of little fabric bows and attach them to alligator clips, they work like a charm and look cute too!
- These bows only need a tiny strip of fabric and a little piece of ribbon.
- You could fashion them yourself from the fabric scraps
- DIY Fabric Scrap Bracelets
- Cut fabric into strips about 10 inches long and 1-3 inches wide (depending on how thick your fabric is and how chunky you want your bracelet).
- Using three strips per bracelet, gather the strips and tie knot at one end with 15 inches of thread, leaving an inch tail of the fabric strands.
- Wrap thread around several times at the top of the braid and double knot, then trim the excess thread.
- Braid the three strands until bracelet is about one inch shorter than you want the finished piece to be.
- Wrap thread around 10-15 times like you did at the top, then knot and trim excess thread.
- Put a dab of glue on the thread for added security and cut off each end of fabric braid right up to the thread.
- Put glue in end caps and insert each end of braided strand into an end cap.
- Attach toggle clasp with jump rings. You can add charms if you like.
DIY Cord Keeper from Fabric Scraps
- It seems that everything has it's own charging cord, and all of the cords turn into a jumbled mess in the basket. How nice it would be to have some nice little cord keepers. All you need is a couple of scraps of fabric, some medium weight interfacing, about an inch of velcro, and about 20 minutes.
- These make up really quickly, and are the perfect quick project to use up the last bits of your favorite fabrics. As a bonus, they make a perfect gift for anyone and any occasion.
- Apply medium weight fusible interfacing to the back of one piece of scrap fabric. Cut one piece of interfaced fabric with the template, and one without. You will need 2 total pieces of fabric for each cord keeper. Cut two small 1 inch pieces of velcro.
- Place the two fabric pieces with right sides together. Stitch around the fabric pieces, 1/4" from the raw edges, leaving 2 inches or so open for turning. Clip the corners close to the stitching line. Notch the two curved ends of the cord keepers.
- Turn the cord keepers right side out through the open space. Press. Stitch 1/8" away from the pressed edges, to both secure the layers, and close off the open turning space.
- Attach the velcro pieces to either end of the cord keeper. One side should go on the front, and one on the back.
- Wrap around your cords and chargers to keep things nice and tidy.
Fabric Scrap Bookmarks
- Cut all fabric scraps into strips – two matching strips of each fabric. Cut to keep them approximately square. They should be around 1-2 inches or 3-5 cm wide and around 6-9 inches or 15-23 cm long.
- Next iron some interfacing onto the back of one of each pair of fabric then lay the two pieces together with wrong side together.
- Next, sew around the sides about 1/4″ or 5mm in from the edge.
- Lastly, trim the edges with pinking shears and add a “V” of ribbon for prettiness!
- Fabric Block Hexagon Clock
- Using the hexagon template, cut out one piece and trace onto your heavy paper. This will become your new template. Mark this hexagon with a T, so you do not use it when you assemble your clock. Use the new template to make 19 hexagons. Cut out.
- Place a hexagon onto your fabric and mark 1/4" seam allowance lines. Cut out. Do this for all 19 hexagons.
- Using permanent glue, place a few tiny dots on the front of your hexagon. Place your fabric on top and press. This will help to secure the fabric as you are folding it over the paper. Place a line of glue near the edge of the hexagon. Fold over fabric. Repeat on all sides.
- Place glue just on the edge of the hexagon that will be touching another hexagon. Press firmly together, and remove any excess glue. You do not need a lot of glue. Repeat until all the hexagons are glued together.
- Using a nice sharp-edged knife, cut a hole in the center of your hexagon clock. Make sure to start checking periodically with your clock parts to make sure they fit snuggly. You do not want it loose.
- Cut a few strips from the remaining paper, and glue to the back of your hexagon making sure they do not interfere with the clock piece. This helps to stabilize the clock a little better.
- Assemble your clock, and hang. Placing your clock in direct sunlight will cause the fabric to fade over time.
Crazy Coasters
- First, cut out three circles for the front of the coaster in three different felt colors and various sizes. Cut also a second larger circle for the back. If you feel wool is expensive, you could use cheap acrylic felt for the backing of the coasters.
- Next, with the top three pieces arranged, and the bottom backing piece behind, head to the sewing machine. Start at one edge and sew in a spiral around the coaster until you reach the center, making sure to tuck the top circles under the sewing machine foot as you go.
- Then, trim any parts of the edge that don’t match up, or where the back piece is showing.
- Finally, head back to the sewing machine sew all around the edge. Make sure that the lines are a little messy and that they aren’t all on top of each other.
- And…done! Enjoy the sight of the coasters resting nicely on the dinner table.
Fabric Scraps To Restyled Shoes
What you'll need:
- Canvas shoes
- Low-tack painter's tape
- Good quality fabric glue
- Fabric scraps
- Paintbrush, 1 inch or smaller
- Small dish
- You can use any canvas shoe for this project—tennis shoes, espadrilles, ballet flats, etc.
- Before you begin, remove any laces.
- Run the shoes through the washer and dryer to get them as clean as possible. Any other means is also OK as long as it is perfectly cleaned.
- Don't use any fabric softener—that will prevent the glue from adhering well to the canvas.
- Mask any non-canvas areas of the shoe with tape.
- Protect your work surface with some paper. Then mask any non-canvas parts of the shoes with low-tack painter's tape. To pass the tape along a curved edge, you can clip it, as shown, or place lots of small pieces of tape along the curve.
- Brush the fabric glue on the canvas, and press fabric scraps into it.
- Now to decoupage the fabric scraps onto the shoe.
- Decoupage is the technique of decorating a surface with cutouts, as of paper, and finishing with layers of lacquer or
- Pour some glue into a small dish.
- Working one section at a time, brush a medium-thick coat of glue onto the shoe.
- Then lightly press the fabric scraps into the glue one at a time, overlapping them as you like. Brush another coat of the glue over the scraps.
- Brush more glue over the fabric scraps. You want to get them saturated with the glue (especially where they overlap one another), and make sure all the edges are flattened against the shoe.
- Repeat this process to cover all the canvas of both shoes.
- Remove loose threads with tweezers.
- If you're, careful, then you can also remove any stray thread bits with tweezers while the glue is still wet.
- If your shoes have a tongue, apply masking to the back of the eyelets so the pieces won't be glued together.
- If your shoes have a tongue, like most tennis shoes, then apply some painter's tape to the back of the eyelets. This will prevent the tongue from getting accidentally glued to the eyelets.
- Leave the shoes to dry overnight.
- Then remove the masking.
- Make sure that your first coat is securely adhering all those scraps.
- After 72 hours, you can wash these shoes in cold water on the gentle cycle, or spot-clean them by hand.
A word of caution - "Fabric glue will hold up best on decorative items that don’t have to be washed often."
The main aim is to eke out a season or two more, not think it is a new one that has been replaced.
- DIY Simple Phone Wallet
- Clasp (any sort of keychain clasp will work)
- Small amount of fabric
- Small amount of fusible fleece
- You can adjust to make it fit the size of your phone.
- You will want to cut your fabric so that it is twice as wide as your phone (with case if you keep it in a case) plus about 2-3 inches. E.g. if the phone is 2.5 inches wide. You could cut the fabric about 8-9 inches wide.
- Cut the length of your fabric at about 14 inches and then cut off excess before sewing it. Measure your phone’s length, double that and add a couple of inches.
- Now if you have a piece of fabric that is about 9 x 14 inches, cut a piece of fusible fleece the same size and iron it to the back of your fabric. This will add bulk and cushion to your project. If your sewing machine struggles with a lot of bulk, use a lighter weight liner.
- Fold your fabric in half lengthwise (so that it is 4.5 inches by 14 inches) and stitch across one of the short sides and down the long side.
- Turn it all right side out. Press it flat.
- Now grab your phone. Fold the wallet up and test how far up you want it to go to match the size of your phone. Cut off any extra length that you don’t want.
- Fold under the un-sewn edge. (Folding it all inward.)
- Stitch this edge closed.
- Now, fold the edge you just sewed up as far as you want it to fit your phone and sew up each side. Your phone should now be able to slip inside:
- Now to make the little strap, cut a piece of fabric about 4 inches long by 2 inches wide. Fold it in half with right sides together and sew up the long side. Turn it right side out and press it. Then fold it in half, loop your clasp though it and sew it in place in several places on the back of your wallet.
DIY Yoyo Puff
- Trace a circle onto cardboard or template plastic.
- Use a 5 inch circle which creates a yoyo around 2 inches across. Use a compass to get a perfect circle shape. Alternatively, you can use an object from around the house. Side plates, jar lids and CD’s, but anything with the right diameter will do.
- Cut out your template and label it for future use.
- Trace around your template or object using your marker or pen, onto the wrong side of your chosen fabric.
- Carefully cut out your fabric circle and give it a quick press with the iron if you haven’t already done so.
- Now we’re set to get stitching. You could double thread an embroidery needle with sewing cotton, and tie a knot in the end. Make sure you have enough cotton to stitch the circumference of the circle.
- Begin by folding over a scant hem and sewing a running stitch around the outside of the circle. If your stitches are close together, you’ll create a larger ‘opening’ at the centre of the yo yo. Wider stitches that close the gap in the centre instead could be a good idea.
- It is quicker to ‘load up’ your needle with a number of stitches at once. It is also easier to check that your stitches are the same size. Then you can pull your thread through and continue sewing.
- When you have completed ‘hemming the circle’, ensure that your last stitch exits on the right side of the fabric. This will make for a neater finish when you finish your yo yo.
- Gently pull your cotton to gather up the stitches into a little puff.
- Flatten the puff and then shape the yo yo with your fingers, helping the ‘pleats’ to be evenly spaced. When you’re content with the shape, use a few extra stitches to secure your yo yo.
- One way to quickly complete your yo yo is to tie the ‘knot’ end of your cotton to the ‘needle’ end and trim the knot once secure. You may like to use invisible stitches and stitch through the pleats to ensure that the sewing is secure instead. Remember to trim off extra cotton and keep any threads hidden inside the yo yo. Your completed yo yo is ready for use!
- You could use any fabric. Experiment with different prints and fabrics or even lace.
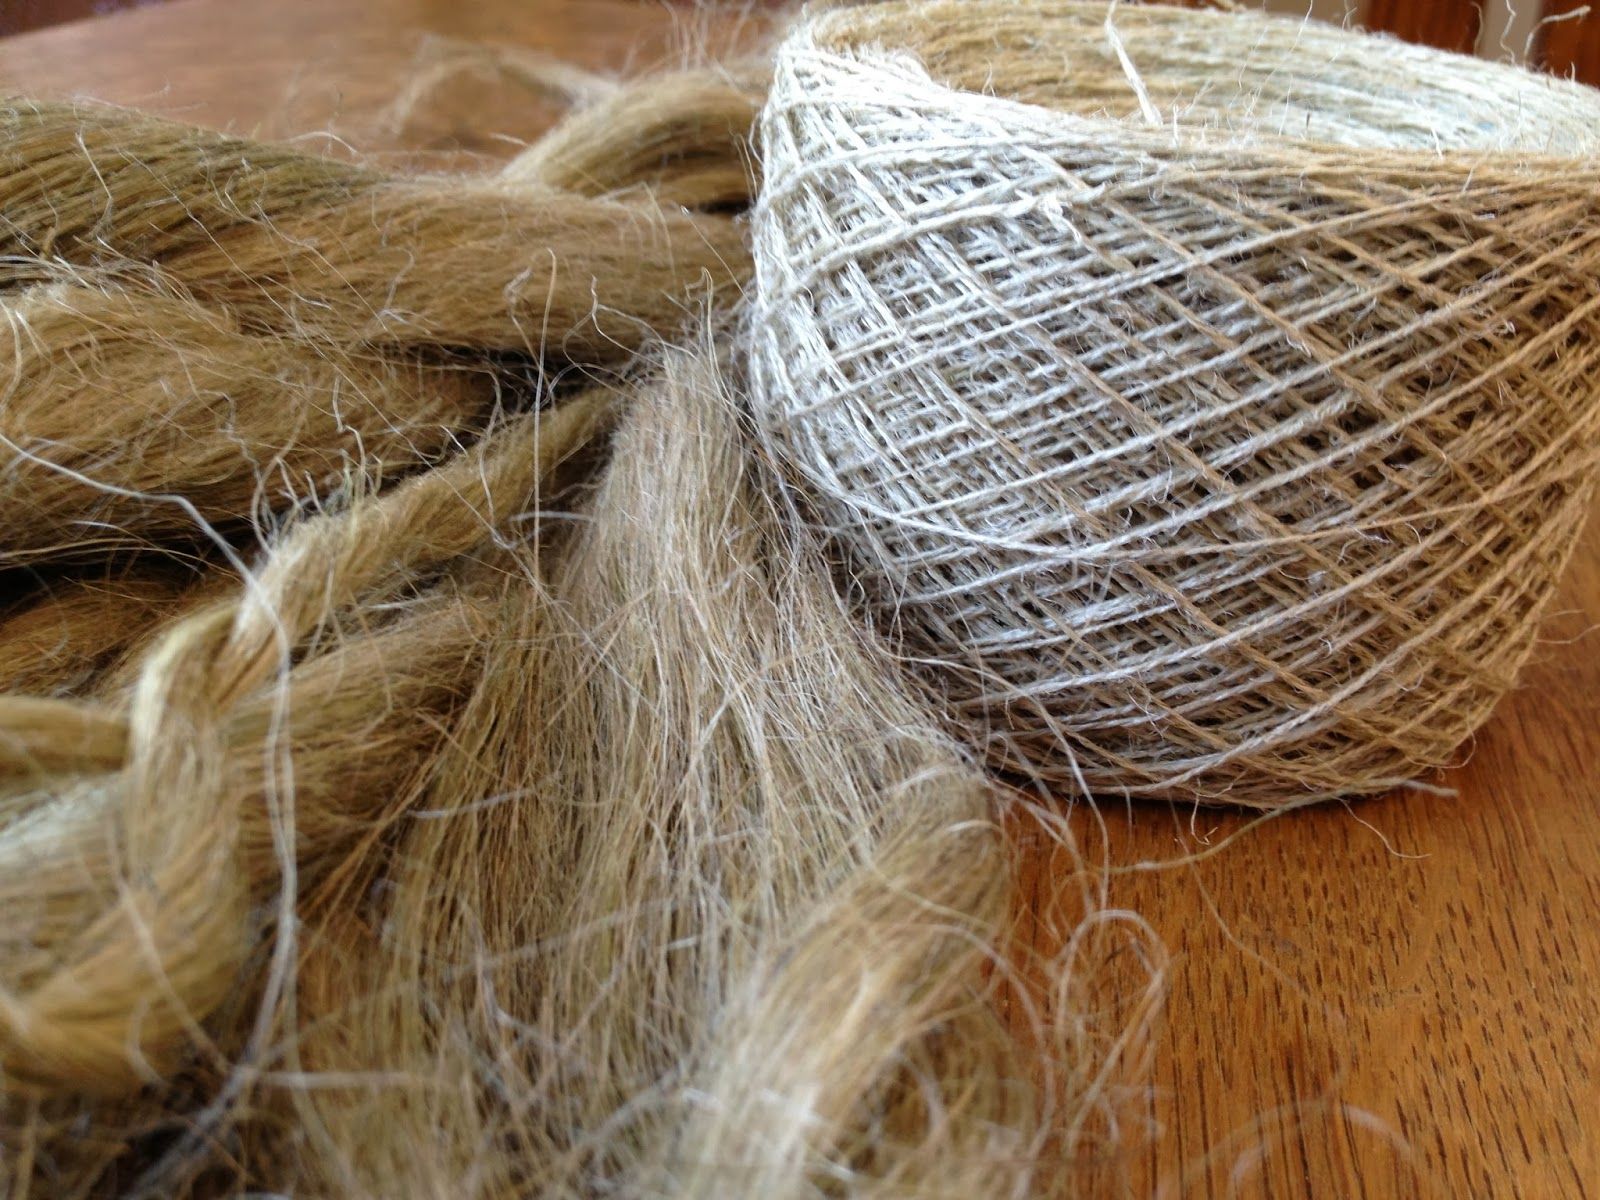
Fabric Scrap Twine
You will need:
- Lots of scrap fabric strips in assorted lengths (max 1″ wide)
- Scissors
- Something to wind your twine on to – I’ve used Vintage wooden spools similar to these* but a piece of cardboard will do too.
- Time and lots of it!
- Lots of scrap fabric strips in assorted lengths (max 1″ wide)Lots of scrap fabric strips in assorted lengths (max. 1” wide)
- ScissorsScissors
- Something to wind your twine on. You could use the olden type wooden spools or even cardboard.
The Method
- Gather a lot of scrap fabric pieces. As much as you can.
- You could be cutting some into strips or even tearing would do.
- Tie two strips together with a small knot.
Step 1: twist strip away from you
Step 2: pull that twisted strip over towards you
Repeat
- Twist the strip away from you. Next pull the twisted strip towards you. Repeat.
- How do you join the next strip? Easy! Just leave a tail of about 1” on the twisted strip and wrap the next strip around it.
- Keep twisting as usual. This join will remain quite strong.
- Keep making the strips and keep on extending the twine. Mind you the twisting could be a little taxing on the wrists.
- It would be nice to have contrast colored strips alternately.You will need:
- Lots of scrap fabric strips in assorted lengths (max 1″ wide)
- Scissors
- Something to wind your twine on to – I’ve used Vintage wooden spools sim
- Fabric Band Aids
- these* but a piece of cardboard will do too.
- Time and lots of it!
- Lots of scrap fabric strips in assorted lengths (max 1″ wide)
- Scissors
- Something to wind your twine on to – I’ve used Vintage wooden spools similar to these* but a piece of cardboard will do too.
- Time and lots of it!
Materials you would need:
- Glue
- Fabric Adhesive
- Band aids
- Ribbon or fabric scraps
- Unwrap the band aids from package and place 3 glue dots on the top of the band aid.
- Add a small piece of fabric or ribbon on top.
- Trim the excess fabric off from around the edges of the band aid.
- So simple isn’t it? And funky too!
- Scrap-Pieced Belt
- Do you have a fairly used belt with that worn look and still use for sentiment’s sake or because it still gives use? Well you could certainly spruce it up fine!
- Take nice strips of scrap fabric that would cover say four inches on the belt. If you have floral strips that are light colored and colorful they would definitely brighten up the waist portion.
- Wrap each strip around the belt width to about four inches. Stitch the fabric pieces either side of the belt. Cover the length of the belt till just before the shiny buckle.
- You have a nice looking fabric covered belt to use.
- The fabric pieces could be slid of the belt and washed at definite time intervals or when they get soiled to maintain a fresh look always. You could also have other strips ready to slide in to have a change of look whenever you need to match it with the dress you are wearing.
- Quick-Easy Sunglasses Case From Fabric Scrap
Scraps of 2 coordinating fabrics
Scraps of fusible fleece
Method :
- Cut your fabric into 7 ½ inch by 4 ½ inch rectangles.
- You will need a total of 4, i.e. 2 from each fabric. Go ahead and fuse your fleece to the wrong side of your outer fabric. Then cut about ½ inch off the length of that one so that it is slightly shorter than your inner fabric.
- Partner each of your rectangles with their matching rectangle. With right sides together, sew around the outer edges of your rectangles, leaving one of the short ends open.
- Turn the inner fabric rectangle that you just sewed right side out and stuff it down into the outer fabric (which is still wrong side out).
- Match up the top edges and then sew around the top edge leaving a small opening to turn it: (just be careful to only sew through your two layers of fabric at a time. This can be a little tricky.)
- You could be sewing around the top. Stop frequently with your needle down to adjust the fabric if necessary:
- Turn it all right side out and stuff the inner piece down into the outer with just a little edge showing at the top. Press it flat and top stitch all the way around the top (again being careful not to sew through all 4 layers, just the two you want).
- And you are done!
- Fabric Scrap Coffee Sleeve
Things you will need:
- Coffee Sleeve Supplies
- Fabric scraps from up to 12 different fabrics
- 4.5″x12″ piece of backing fabric
- 4.5″x12″ piece of fusible fleece
- 1 coordinating elastic hair tie
- Small button
- Coordinating thread
- sewing machine
- scissors
- Seam Allowance: 1/4″ unless noted
- Fabric Scrap Rosette Pillow
- Cut several strips of fabric about 2 ½ inches wide at varying lengths.You will also need a solid fabric for the body of the pillow. You could use an 18 inch square for the front and 2 Nos. 18 x 12 inch pieces for the back.
- You would need two pieces for the back so that you can make an overlapping sleeve. Then you can slip your pillow form in.
And how about the flower at the centre?
A Scrappy Strip Rose
You’ll need:
- 5” wide scraps of fabric in whatever colors your heart desires cut to various lengths.
- You could have it 3″ long to 14″ long. For fabric use leftover binding strips.
- Strips could be added up in length to about 2 yards, which made me a 5″ flower.
- Add or take away strips or cut them shorter if you want a bigger or smaller flower.
- Shorter strips and more of them will make a more colorful flower.
- A sewing machine and a needle and thread.
- A piece of felt or other strong fabric, a hot glue gun, and a broach bracket.
How to do it
- Put them in order from the color you want in the center of the flower, to the outside of the flower.
- Now sew them all together end to end, and press seams open.
- Now folding your strip in half as you go, serge OR sew a zig zag stitch down the raw edges. Do the same on the ends.
- With your sewing machine….increase the stitch length as high as it will go and increase the thread tension as high as it will go. Now sew down your strip again right along your sewn/serged edge. The strip should gather as you go. If it is gathering TOO much, lower the stitch length
- Starting with the end you want as the center of the flower, fold the raw edge down and make the center of the flower by folding the strip around it. Sew in place either by hand or machine with a few stitches.
- Continue to wrap the sewn/serged edges around the center, securing the edges to the center with your needle and thread. I put the needle and thread all the way through the center for the first few layers.
- As you continue adding the layers the center will have a tendency to stick out, but try to keep the sewn edges lined up and flat. Also as you add more and more layers, you can secure the layers to the previous layers with a stitch every half inch or so. If you secure the layers loosely to the previous layer, you’ll get a better result.
- When you get to the end, or the flower is as big as you want it, cut off the end and tuck the end to the back. Secure it with a stitch and knot your thread off.
- Make sure your flower is just right and poke the center down a little if its sticking up too much to make the back flat.
- Cut a circle out of your felt, just big enough to cover all of the sewn / serged edges.
- With your hot glue gun, cover the backside of your flower with glue, then press the felt onto the back.
- Then hot glue your broach bracket to the felt.
- And there you have it, your cute scrappy flower you can attach to just about anything.
You could use as little or as much material as you want, depending on the size basket you are making.
Materials list:
- A collection of old t-shirts or similar colorful material could do
- Jersey fabric, minimum 1 yd. length for braid continuity
- Spool of nylon crochet thread (a dark color is preferable)
- Beads with minimum 1/4" dia. holes (optional)
- Thread
- Sharp upholstery needles
- Regular needles
step 1, cutting:
- Cut the jersey fabric and the t-shirts into similarly sized strips, around 2-2 1/2" wide.
- You will get the most out of the t-shirts from the torso area, yielding 3-5 strips from each t-shirt. The jersey strips should be a yard long.
- Baste stitch three t-shirt strips together at a time to form longer pieces.
- Do as many of these as you can manage until you think you have what you need.
- Don’t sew more than three smaller strips together at a time, as anything longer than that will be difficult to braid.
- Sew the ends of two different t-shirt strips to the end of one of the jersey strips. This will be the top of your braid.
- Secure that end to something stable and start braiding.
- As you come to the ends of the t-shirt fabric pieces, attach new pieces to the old with a quick stitch or two so you can continue braiding. Same goes for when you reach the ends of the longer jersey pieces.
- You will want to start threading your beads on only after you have finished enough braiding to make the bottom of your basket, where you don't want beads.
- Wind the braid up like a rug on a flat surface from time to time to find out how big you would like the bottom to be. Once you start braiding what will end up being the walls of the basket, add beads as often as you'd like.
- Eventually you're going to end up with an ENORMOUS BRAID!
step 4, sewing the bottom:
- When you are ready to start sewing, fold the unbeaded end of the braid over and sew those two pieces together side by side with the crochet thread to form an oblong basket bottom, or start coiling the braid right from the get-go for a more circular bottom. Once you startup the side of the basket you can stitch through the fabric so the stitching is only visible on one side.
- When you are ready to make the walls, turn the braid 90º into an upright position and sew to outer braid of basket bottom. That stitching is best done at the exterior of the basket.
- After that, move the stitching to the interior of the basket. Keep stacking the braid on top of itself, sewing the interior braid edges. Take care that the crochet thread does not show through to the outside.
- When sewing near a bead, keep your braid in position and secure all around the bead, making sure the bead stays to the exterior of the basket walls.
- Keep on sewing until you get the height you want!
step 6, adding handles and finishing the job:
- To create handles, decide where you want them to be located and how wide you'd like them to be.
- Hold the braid off of the top of the basket at the handle and add very strong, repetitive stitching at the fork in the road where the handle comes away.
- Leave a little slack in the handle bit, and secure it again at the other side where it meets the top of the basket again.
- Keep sewing that braid at the top of the basket until you reach the opposite side and add a second handle.
- To finish up, keep sewing the braid to the top of the basket again after the second handle for a few inches, then you'll end the braid in a taper.
- To create the taper, cut the width of each of the three pieces of the end of the top braid to just about ¾ " wide, being sure that they are still continuations of pieces already in the existing braid.
- Braid these thinner pieces into a much skinnier braid a few inches long and then secure to top of basket. Tuck the very end of the taper into a bigger braid at the inside of the basket, and stitch to secure in place.


