Drawn Thread Embroidery – A novel way of cutting fabric thread to create designs
Weaving a fabric is usual and further enhancement is through additions by way of embroidery, painting, appliqué, brocade or other forms of decorating. But novel or unusual is the cutting of fabric thread from the finished fabric and using the loose threads to knot and create a design. An arty way of creating design this is what drawn thread embroidery is about.
 What is drawn thread embroidery?
Drawn thread embroidery is a counted thread openwork embroidery technique in which thread (either weft or warp) is removed from the fabric and decorative stitches and knots are formed over the remaining thread in a pattern.
 Which fabric is used for this?
Drawn thread work has mostly been done on linen but one could always attempt this in any regular weave fabric with visible threads.
Traditionally the work done is white on white (white fabric and white thread). Nowadays all sorts of combinations are used.
What becomes of the empty spaces?
The holes (open spaces) made by the pulled thread forms a part of the design.
What is the method used to create the design?
As the name suggests, you cut and draw the thread/threads and remove it from the fabric. One thread or many threads are simultaneously removed according to the pattern. Is it easy?
Once you get a knack for this embroidery it is easy to make fascinating embroidery designs with it.
What are the ways of doing this embroidery?
There are two ways to do this embroidery.
Method 1 - You can tie knots on bundles of thread drawn in a pattern or
Method 2 - Fill the design with filling stitches all over.
Could you kindly explain the two methods one by one?
Method 1 - Bundling and knotting
- Mark the area or the design for the embroidery.
- Work buttonhole stitches around the edges where you will be cutting the thread. This is done so that the thread would not unravel from the edges.
- A close buttonhole stitch over 2 or 3 threads along the edge is appropriate and enough to hold the design.
- Make a mark 3/4 inch on the design for pulling out the thread.
- Usually, thread is counted on the fabric to be cut but this is also an alternative.
- The thread is cut from the back and the hanging thread is trimmed.
- Cut and pull the horizontal thread (weft thread of the fabric) inside the design area on the 3/4 inch area.
- You can begin by cutting the fabric along the buttonhole edge ensuring that you are cutting only the horizontal threads.
- The vertical threads should be intact.
- Cut on both ends. Use seam ripper or a needle to lift the thread one by one from the middle.
- You have to bundle thread on the top edge and bottom edge. These knots will also bundle the threads for knotting later.
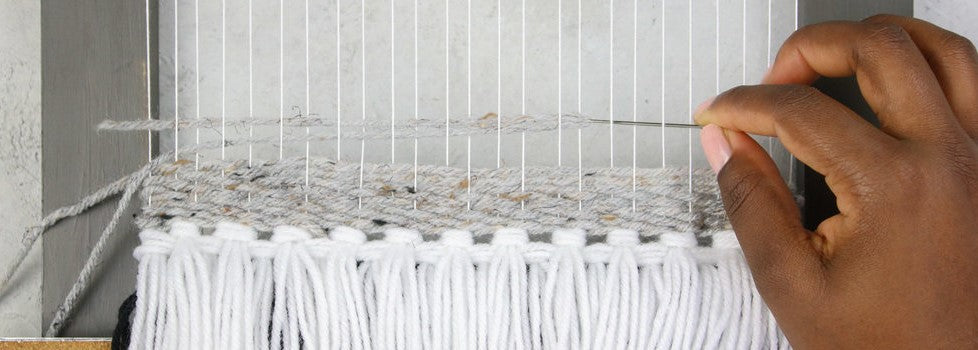
- Weave needle through the buttonhole stitches on the sides on the back of the fabric to anchor the thread. Now bring needle up 4 threads from the side.
 Weave needle through the buttonhole stitches on the sides on the back of the fabric to anchor the thread. Now bring needle up 4 threads from the side.
  Then take the needle from the side and come up at the same place you had come up earlier (4 threads from the side edge), enclosing the needle in the twist of the thread.
 Tighten the thread. This will form your first knot; continue making knots like this every 4 threads.
 The completed work will look like this.
Do the same knots for the bottom edge as well.
 Now you should start knotting the threads together in a pattern which is what the drawn thread embroidery is all about.
Thread the needle with a thicker thread than the embroidery floss or two strands of embroidery floss. Anchor the thread under the buttonhole stitches (no need to make knot) then come up to the face of the fabric. You will have to make the knots so that the thread is always taut against the fabric. You have already bundled the threads. Now knot these thread bundles together.
Follow the steps below to knot these bundles.
Step 1 - Bring the needle and thread around the two thread bundles once (Overcast). Tighten. As shown in
Step 2 - Now make the simple knot. Bring up the needle inside the thread twist as in the The finished work will look like this.
There is however another way and easy to do. The drawn thread work is to fill the whole design with simple filling stitches. As an example zig-zag stitches are used to fill the design.
There are many other filling stitches you can use in drawn thread embroidery. You can also create a different effect by varying the thickness of thread used; e.g. one thread vs 4 threads to make the filling stitches. Experiment and see which you like the most.
Outline the design with a backstitch. Here because we are not removing as many threads a close backstitch is enough to keep the design intact.
 Pull the thread ; remove 3 threads after every 4 threads . If you want smaller holes, remove less thread like 2 rows of thread.
This is how it will look from the front.
Make the zig zag stitches over the threads through the open spaces made by the pulled thread.


